Editing raw real estate photos in lightroom , the significance of high-quality images cannot be overstated. Potential buyers often form their initial impressions based on visual representations of a property, leading to the crucial realization that outstanding photography serves as a powerful marketing tool. The heightened interest generated by attractive images can significantly influence a buyer’s decisions, often allowing properties to stand out in a crowded marketplace. Well-composed, vivid photographs create an emotional connection and can increase trust in the seller or agent, ultimately facilitating quicker sales and potentially higher offers.
Introduction to Real Estate Photography
In this context, real estate photography plays an indispensable role. Professional-grade images illuminate the strengths of a property, emphasizing its features and unique selling points. Quality images help buyers to visualize themselves within the spaces, enhancing the likelihood of a property being selected for viewing. Moreover, as many potential buyers begin their search online, first impressions formed by these photographs can have a lasting impact. As a result, investing in high-quality photography is no longer just an advantage; it is a necessity for anyone looking to market real estate effectively.
This blog post aims to guide real estate professionals and enthusiasts alike in enhancing raw images using Adobe Lightroom, a powerful editing software recognized for its capabilities in transforming standard photographs into stunning visuals. By understanding how to manipulate exposure, contrast, and color balance effectively, one can elevate ordinary photos into compelling marketing assets. The techniques discussed herein will empower individuals to present properties in the best light, ensuring that every photograph resonates with potential buyers and conveys the true essence of the listed properties.

Understanding Raw File Formats
Raw file formats play a crucial role in professional photography, particularly when it comes to editing images for real estate purposes. Unlike standard compressed formats such as JPEG, raw files capture all the unprocessed data straight from the camera’s sensor. This unprocessed nature enables photographers to retain the highest quality possible and provides them with the flexibility needed during post-processing. The most common raw formats include CR2 for Canon cameras, NEF for Nikon cameras, and ARW for Sony, among others.
One of the primary advantages of using raw files is their superior color depth. A typical JPEG file has a bit depth of 8 bits per channel, which allows for 256 tonal variations per color channel. In contrast, raw files can achieve a higher bit depth of 12 or 14 bits per channel, resulting in over 4000 tonal variations per channel. This abundance of tonal levels provides photographers with the ability to make significant enhancements without sacrificing image quality, effectively allowing for more expressive and vibrant real estate photos.
Furthermore, raw files boast a higher dynamic range compared to standard JPEGs, enabling better capture of details in both shadow and highlight areas. This is particularly beneficial in real estate photography, where lighting conditions can often be challenging. Photographers can recover details from highlights that would be lost in a JPEG, making it easier to create visually appealing images that showcase properties in the best light.
Additionally, editing raw files yields greater flexibility in adjustments. Photographers can fine-tune exposure, contrast, saturation, and other settings extensively without degrading the image quality. This flexibility makes raw files the preferred choice for professionals seeking to enhance the visual impact of their real estate photographs, ensuring that every property is presented at its best.
Getting Started with Lightroom
Adobe Lightroom is an essential tool for photographers seeking to enhance their images, particularly in the realm of real estate photography. This powerful software allows users to process and edit RAW images with remarkable ease and efficiency. At first glance, the Lightroom interface may seem daunting, but it is designed to streamline the workflow of photographers. The primary interface is divided into several modules, including Library, Develop, and Map, each serving distinct purposes during the editing process.
To begin using Lightroom, new users must first download and install the software. Once installed, users are encouraged to familiarize themselves with the layout and functionality of the interface. A crucial first step involves importing RAW images into the Library module. This can be accomplished by selecting the ‘Import’ button located in the bottom-left corner. Users can choose to import images from their computer, a memory card, or other external devices. During this process, it is advisable to organize files using folders or collections, which will facilitate a more efficient editing workflow.
Understanding the Library module is essential for managing images effectively. This module allows users to view, organize, and sort their photos. Utilizing keywords, ratings, and metadata can greatly enhance searchability, making it simpler to locate specific images later on. Additionally, the Filter Bar can be employed to visually narrow down selections based on criteria such as star ratings or flags. It is advisable for users to develop a consistent method of categorizing their work, which will play a pivotal role as their photography portfolio grows.
By mastering these initial steps, users will establish a solid foundation in Lightroom, setting the stage for more advanced editing techniques. The ease with which one can import, organize, and manage images provides a distinct advantage in the realm of real estate photography, allowing photographers to present their work in the best possible light.
Basic Adjustments to Enhance Photo Quality
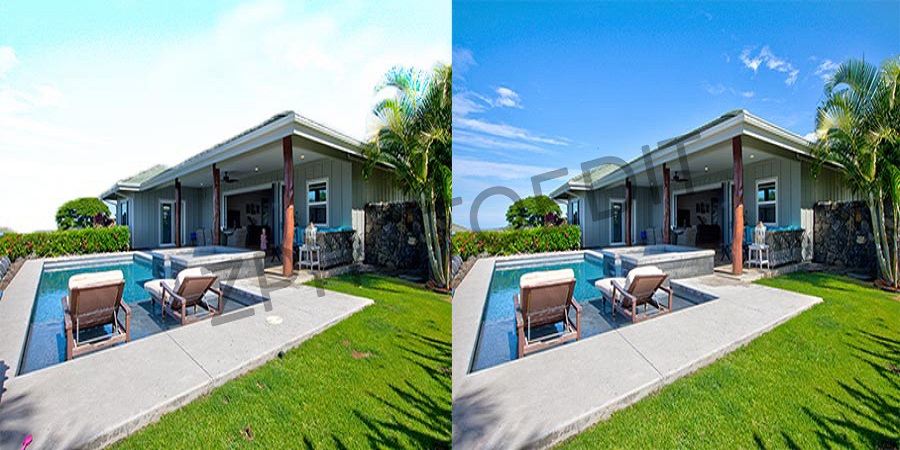
When it comes to editing real estate Photo editing in Adobe Lightroom, making basic adjustments is imperative to improve overall image quality. The first step typically involves exposure correction. In many instances, images may appear too dark or overly bright due to lighting conditions during the shoot. By carefully adjusting the exposure slider in Lightroom, you can achieve a well-balanced image that realistically represents the property. Ensuring the correct exposure not only enhances the visual appeal but also sets a solid foundation for further adjustments.
Next, contrast enhancement plays a critical role in making the image stand out. Increasing the contrast helps to differentiate between the highlights and shadows, creating a more dynamic and three-dimensional look. This adjustment is particularly crucial in real estate photography, where details in architectural features can be easily lost in flat images. A well-contrasted photograph captures attention, inviting potential buyers to explore the space further.
Another essential adjustment involves white balance. Properties can exhibit varying color tones depending on the time of day and existing lighting conditions. By adjusting the white balance in your images, you can neutralize unwanted color casts that might occur due to artificial lighting or the golden hue of sunset. This adjustment ensures that spaces look inviting and true-to-life, making them more appealing to prospective buyers. By utilizing the temperature and tint sliders, you can achieve the correct balance, creating a more consistent color profile across your portfolio.
Overall, these fundamental adjustments—exposure correction, contrast enhancement, and white balance adjustment—form the core of professional photo editing in Lightroom. Mastering these techniques ensures that your real estate images not only look polished but also effectively showcase the property’s features and atmosphere, significantly enhancing the likelihood of attracting potential buyers.
Utilizing Lightroom’s Advanced Editing Tools
Lightroom offers a variety of advanced editing tools that can significantly enhance your real estate photography, allowing you to showcase properties in their best light. Among these tools, the tone curve stands out as a powerful option for fine-tuning the brightness and contrast of your images. This feature allows you to manipulate the tonal range, making adjustments to shadows, midtones, and highlights based on your creative vision. By carefully altering these curves, you can produce images that are not only more visually appealing but also accurately represent the property’s ambiance.
Another essential component in Lightroom is the HSL (Hue, Saturation, Luminance) sliders. This tool enables you to adjust the color attributes of your photos with precision. For example, if a property features vibrant landscaping or unique architectural details, you can increase the saturation of specific colors, making them stand out without compromising the overall integrity of the image. Additionally, fine-tuning the luminance can help ensure that colors are balanced, thereby presenting the property in a more inviting manner. By manipulating these sliders, photographers can convey the mood of a space effectively, drawing potential buyers’ attention to key features.
Selective adjustments further enhance the capabilities of Lightroom. With tools such as the adjustment brush, graduated filter, and radial filter, photographers can make nuanced edits to specific areas of an image. For instance, darkening the sky to create contrast against a well-lit property can dramatically improve the visual impact. These adjustments are essential in real estate photography, as they can highlight unique selling points like high ceilings or expansive windows. Ultimately, the advanced editing tools in Lightroom provide the flexibility needed to refine images, ensuring they are as captivating as the properties they represent.
Creating Stunning HDR Images
High Dynamic Range (HDR) photography is an essential technique for capturing the full tonal range of a scene, especially in real estate photography. This method entails taking several images of the same subject at different exposures, which allows photographers to ensure that both the highlights and shadows retain their detail. When used effectively, HDR photography can transform typical real estate images into stunning visual representations, showcasing the property in all its glory.
Lightroom, renowned for its powerful editing capabilities, provides an excellent platform for merging these multiple exposures into a single HDR image. The process begins by capturing a series of photographs at varying exposure levels—typically, this ranges anywhere from three to five shots. It is crucial to ensure that these photos are taken from the same viewpoint, which can be accomplished using a tripod to maintain consistency.
After capturing your images, the next step is to import them into Lightroom. With the images selected, users can then navigate to the ‘Photo’ menu and select ‘Merge’ followed by ‘HDR.’ Lightroom will automatically align the images to correct any shifts and combine the exposures. The program also offers an option to adjust the deghosting settings, which is particularly useful when dealing with moving objects within the frame, such as trees or people.
Related articles: Best real estate photo editing services
The benefits of utilizing HDR imaging in real estate photography are substantial. Not only does it provide a more balanced and visually appealing representation of the property, but it also enhances the overall detail seen in both bright and dark areas of the photos. This capability is especially advantageous in real estate, where showcasing the aesthetics of both interior and exterior spaces is vital. By employing HDR techniques in Lightroom, photographers can significantly elevate the quality of their real estate images, making them stand out in the competitive market.